

Why Windows Still Look Streaky After Cleaning
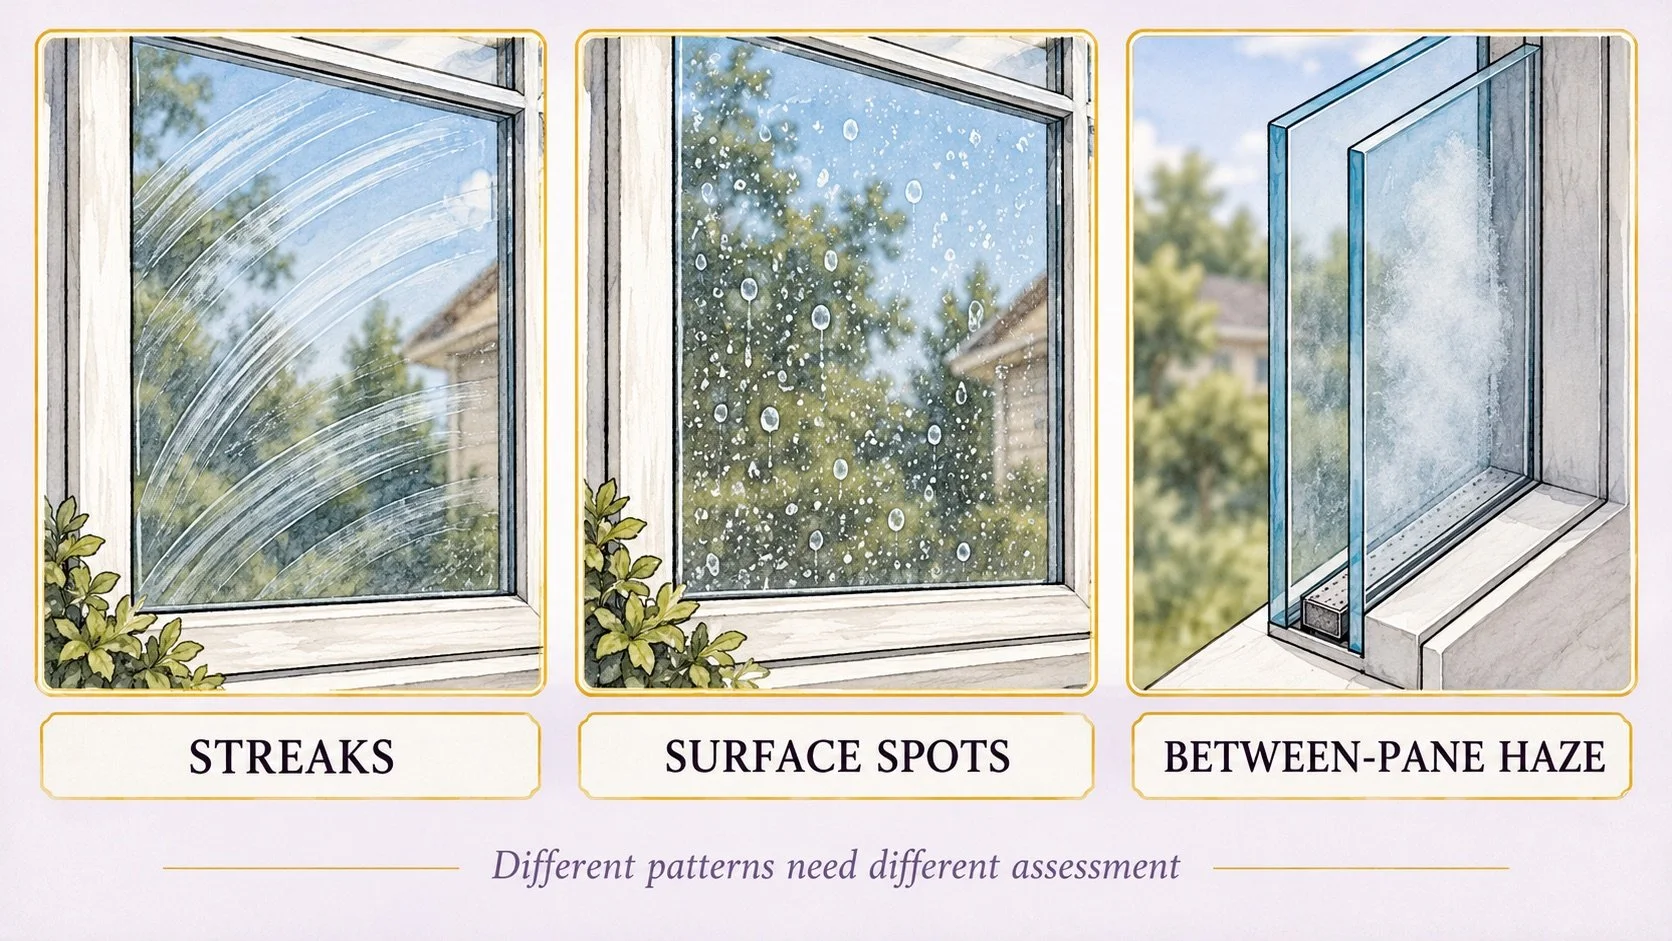
Illustration: streaks, surface spots and between-pane haze can look different and need different assessment. Appearance alone is not a diagnosis.
Describe the pattern before choosing a fix
Broad smears or film: may point to residue, fast drying or a dirty cloth.
Repeated narrow lines: check the squeegee edge or tool condition.
Distinct pale dots or rings: may be surface deposits and need material-specific assessment.
Haze that appears trapped between panes: is not reachable by routine cleaning and may require a window professional.
These are observation labels, not diagnoses. Coatings, permanent surface damage and seal conditions cannot be confirmed from appearance alone.
Try one safe test pane
Choose one safely accessible pane, follow its manufacturer’s care instructions, use clean tools out of direct sun and remove the permitted solution completely. Let it dry before repeating the process. Stop if you see scratching, a damaged finish or a mark you cannot identify.
Review sill and track care, compare professional cleaning scope, or request an estimate.
You finish washing a window, put away the supplies, and notice streaks as soon as the light changes. Before reaching for more cleaner, look at the pattern. A smeared film, narrow lines, and scattered white spots can have different causes. Identifying what you are seeing makes the next pass more useful.
The glass dried before you finished
Direct sunlight can warm the glass and dry cleaning solution before you remove it. That leaves residue behind, even when your technique is otherwise careful. Andersen recommends cleaning out of direct sunlight for this reason.
Choose a shaded side of the house or a time when sunlight has moved off the window. Work on one manageable section at a time. If the surface is drying faster than you can finish it, pause and change the conditions rather than repeatedly adding cleaner.
Cleaner is still on the surface
More product does not necessarily produce clearer glass. A pane may look clean while wet but show a film once the remaining solution dries. Follow the cleaner's directions and your window manufacturer's care guidance, including any instructions for removing residue.
Avoid treating every window with the same homemade mixture. Coatings, applied films, surrounding finishes, and specialty glass can have different requirements. If you recently changed products, check compatibility before trying a stronger formula.
Your tools need a reset
A cloth that has already picked up dirt can spread it across the next pane. Lint can also make freshly washed glass appear unfinished. Start with clean, soft, lint-free cloths and switch to a fresh section as you work. Keep a separate cloth for the surrounding frame.
If you use a squeegee, inspect the rubber edge for debris or damage and keep it clean between passes. Pella recommends wiping the squeegee edge after each swipe. A repeating narrow line is a reason to check your equipment before scrubbing the same area again.
The edges need attention
Take a second look at the border of the glass. Small amounts of cleaning solution can remain along the edge after the center looks clear. Use a clean cloth to finish accessible edges and collect drips, following the care instructions for the frame material.
Keep liquid controlled around wood and painted trim. Marvin's maintenance guidance recommends removing remaining solution from the glass and surrounding parts. Leaving the frame wet adds another problem to a job that was meant to make the window look better.
Those white spots may be deposits
Distinct pale dots or rings, especially near a sprinkler, deserve a closer look. Mineral deposits can require a different approach from ordinary fingerprints or dust. Repeating a routine wash may leave them unchanged.
Before using a deposit remover, identify the glass and check which treatments its manufacturer permits. Skip abrasive pads and improvised scraping. If you are unsure whether the mark is a deposit, a coating issue, or permanent surface damage, have it assessed before experimenting.
The haze could be between the panes
Look from both sides when it is safe to do so. If the cloudy patch appears inside an insulated glass unit and cannot be reached from either exposed surface, further washing will not remove it. Pella notes that moisture between sealed panes can be associated with a failed seal.
That is a reason to contact the window manufacturer or a qualified window service provider. A cleaning visit cannot repair the seal of an insulated glass unit.
Make the next attempt a small one
Choose one safely accessible pane. Check its care instructions, use clean equipment, work out of direct sun, and remove the cleaning solution completely. Let it dry and inspect the result before repeating the process across the house. Stop if you notice scratching, damaged finishes, or a mark you cannot identify.
If you would rather have the glass and its condition checked together, explore DiamondClean Solutions window cleaning. Request a free estimate and mention any persistent spots or streaks so we can discuss the work you need.